Pythonのtkinterライブラリは、GUI機能を開発するライブラリです。
tkinterライブラリ使用することで、デスクトップアプリケーションを作成することができます。
tkinterライブラリの使い方を紹介します
- tkinterライブラリのインストール
- tkinterライブラリの使い方
tkinterライブラリのインストール
tkinterライブラリをインストールする手順を紹介します。
tkinterのインストール
tkinterのインストールします。
コマンドライン
sudo apt install python3-tktkinterの動作確認
tkinterの動作を確認して、インストールされているかを確認します。
コマンド実行例
$ python3 -m tkinterGUI画面
tkinterライブラリの使い方
tkinterライブラリで、GUI機能を開発する方法を紹介します。
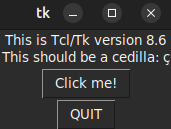
ウインドウ作成
ウィンドウを作成します。
ウインドウを作成
ウインドウを作成します。
ソースコード
import tkinter as tk

root = tk.Tk()

root.mainloop()
コマンド実行例
$ python3 -B tkinter_window.pyGUI画面
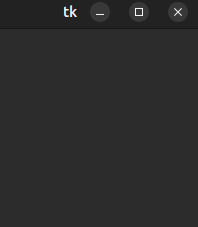
サイズ指定でウインドウを作成
サイズ指定でウインドウを作成します。
ソースコード
import tkinter as tk

root = tk.Tk()
root.geometry("400x400")

root.mainloop()
コマンド実行例
$ python3 -B tkinter_window_geometry.pyGUI画面
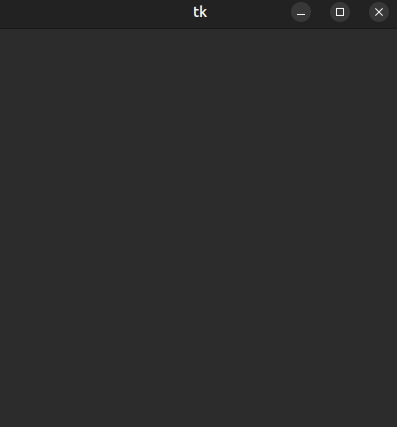
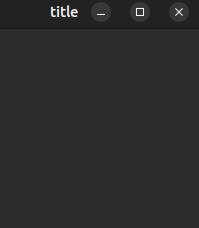
タイトル指定でウインドウを作成
タイトル指定でウインドウを作成します。
ソースコード
import tkinter as tk

root = tk.Tk()
root.title("title")

root.mainloop()
コマンド実行例
$ python3 -B tkinter_window_title.pyGUI画面
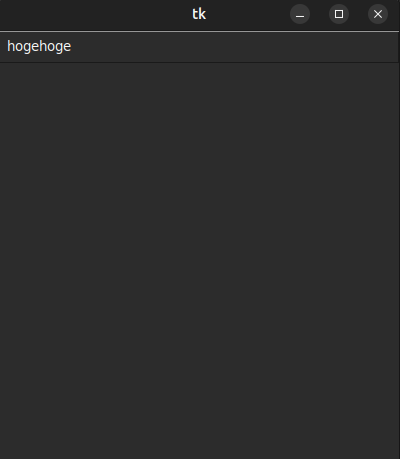
ラベル
ラベルを追加します。
ラベルを追加
ラベルを追加します。
ソースコード
import tkinter as tk

root = tk.Tk()
root.geometry("400x400")

label = tk.Label(root, text="hogehoge")
label.pack()

root.mainloop()
コマンド実行例
$ python3 -B tkinter_label_pack.pyGUI画面
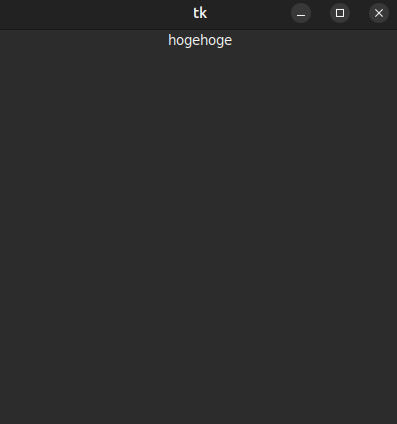
場所指定でラベルを追加
場所指定でラベルを追加します。
ソースコード
import tkinter as tk

root = tk.Tk()
root.geometry("400x400")

label = tk.Label(root, text="hogehoge")
label.place(x=200, y=200)

root.mainloop()
コマンド実行例
$ python3 -B tkinter_label_place.pyGUI画面
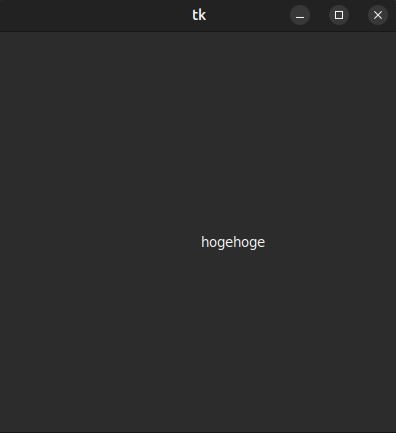
色指定でラベルを追加
色指定でラベルを追加します。
ソースコード
import tkinter as tk

root = tk.Tk()
root.geometry("400x400")

label = tk.Label(root, text="hogehoge", foreground='#ff0000', background='#ffffff')
label.pack()

root.mainloop()
コマンド実行例
$ python3 -B tkinter_label_color.pyGUI画面

テキストボックス
テキストボックスを追加します。
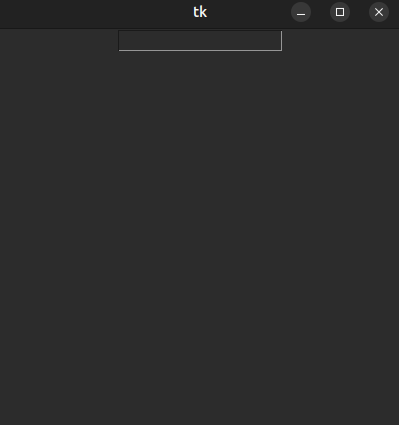
基本的なテキストボックスを追加
基本的なテキストボックスを追加します。
ソースコード
import tkinter as tk

root = tk.Tk()
root.geometry("400x400")

textbox = tk.Entry()
textbox.pack()

root.mainloop()
コマンド実行例
$ python3 -B tkinter_textbox.pyGUI画面
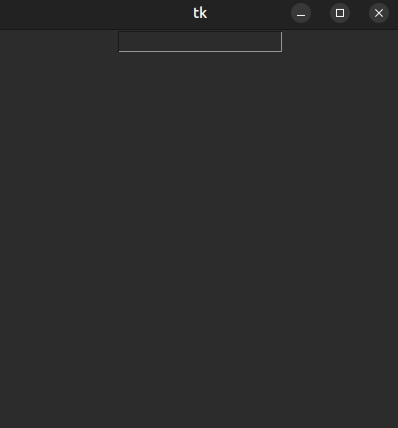
幅指定でテキストボックスを追加
幅指定でテキストボックスを追加します。
ソースコード
import tkinter as tk

root = tk.Tk()
root.geometry("400x400")

textbox = tk.Entry(width=40)
textbox.pack()

root.mainloop()
コマンド実行例
$ python3 -B tkinter_textbox_width.pyGUI画面

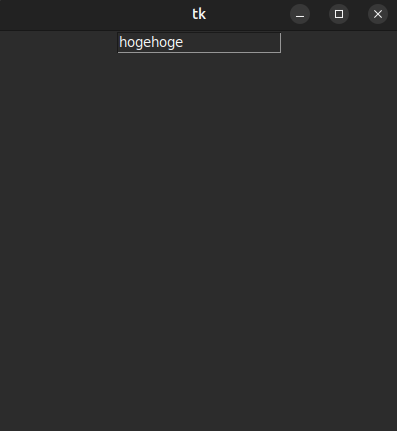
テキストボックスを挿入
テキストボックスを挿入します。
ソースコード
import tkinter as tk

root = tk.Tk()
root.geometry("400x400")

textbox = tk.Entry()
textbox.insert(tk.END, "hogehoge")
textbox.pack()

root.mainloop()
コマンド実行例
$ python3 -B tkinter_textbox_insert.pyGUI画面
テキストボックスの内容を取得
テキストボックスの内容を取得します。
ソースコード
import tkinter as tk

root = tk.Tk()
root.geometry("400x400")

textbox = tk.Entry()
textbox.insert(tk.END, "hogehoge")
textbox.pack()

text = textbox.get()
print(text)

root.mainloop()
コマンド実行例
$ python3 -B tkinter_textbox_get.py
hogehoge
GUI画面

テキストボックスを削除
テキストボックスを削除します。
ソースコード
import tkinter as tk

root = tk.Tk()
root.geometry("400x400")

textbox = tk.Entry()
textbox.insert(tk.END, "hogehoge")
textbox.pack()

textbox.delete(0, tk.END)

root.mainloop()
コマンド実行例
$ python3 -B tkinter_textbox_delete.pyGUI画面
ボタン
ボタンを表示します。
ボタンを表示
ボタンを表示します。
ソースコード
import tkinter as tk

root = tk.Tk()
root.geometry("400x400")

button = tk.Button(root, text="hogehoge")
button.pack()

root.mainloop()
コマンド実行例
$ python3 -B tkinter_button.pyGUI画面
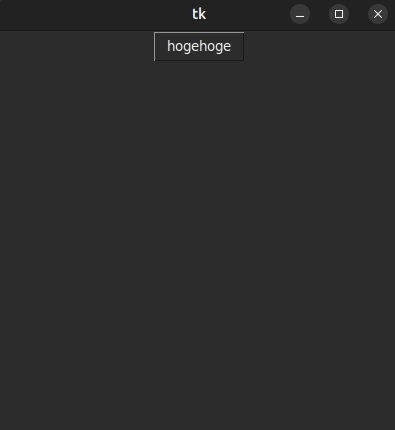
幅指定でボタンを表示
幅指定でボタンを表示します。
ソースコード
import tkinter as tk

root = tk.Tk()
root.geometry("400x400")

button = tk.Button(root, text="hogehoge", width=40)
button.pack()

root.mainloop()
コマンド実行例
$ python3 -B tkinter_button_width.pyGUI画面

ボタンのイベントを登録
ボタンのイベントを登録します。
ソースコード
import tkinter as tk

def left_click(event):
        print("left click.")

def wheel_click(event):
        print("wheel click.")

def right_click(event):
        print("right click.")

root = tk.Tk()
root.geometry("400x400")

button = tk.Button(root, text="hogehoge")
button.bind("<Button-1>", left_click)
button.bind("<Button-2>", wheel_click)
button.bind("<Button-3>", right_click)
button.pack()

root.mainloop()
コマンド実行例
$ python3 -B tkinter_button_bind.py
left click.
wheel click.
right click.
GUI画面

チェックボックス
チェックボックスを追加します。
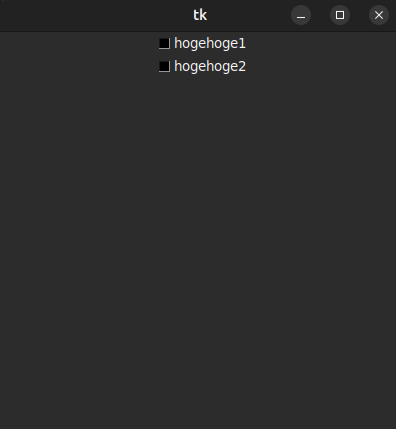
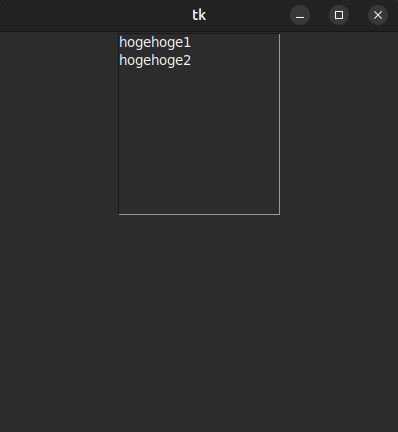
チェックボックス追加
チェックボックスを追加します。
ソースコード
import tkinter as tk

root = tk.Tk()
root.geometry("400x400")

item_list = ["hogehoge1", "hogehoge2"]

for item in item_list:
        checkbox = tk.Checkbutton(root, text=item, selectcolor="#000000")
        checkbox.pack()

root.mainloop()
コマンド実行例
$ python3 -B tkinter_checkbox.pyGUI画面
初期状態指定でチェックボックスを追加
初期状態指定でチェックボックスを追加します。
ソースコード
import tkinter as tk

root = tk.Tk()
root.geometry("400x400")

checkbox_value1 = tk.BooleanVar()
checkbox_value1.set(True)

checkbox_value2 = tk.BooleanVar()
checkbox_value2.set(False)

item_dict = {"hogehoge1":checkbox_value1, "hogehoge2":checkbox_value2}

for item, value in item_dict.items():
        checkbox = tk.Checkbutton(root, text=item, selectcolor="#000000", variable=value)
        checkbox.pack()

root.mainloop()
コマンド実行例
$ python3 -B tkinter_checkbox_init.pyGUI画面

チェックボックスの状態を取得
チェックボックスの状態を取得します。
ソースコード
import tkinter as tk

root = tk.Tk()
root.geometry("400x400")

checkbox_value1 = tk.BooleanVar()
checkbox_value1.set(True)

checkbox_value2 = tk.BooleanVar()
checkbox_value2.set(False)

item_dict = {"hogehoge1":checkbox_value1, "hogehoge2":checkbox_value2}

for item, value in item_dict.items():
        checkbox = tk.Checkbutton(root, text=item, selectcolor="#000000", variable=value)
        checkbox.pack()

checkbox_value1_get = checkbox_value1.get()
checkbox_value2_get = checkbox_value2.get()

print(checkbox_value1_get)
print(checkbox_value2_get)

root.mainloop()
コマンド実行例
$ python3 -B tkinter_checkbox_get.py
True
False
GUI画面

ラジオボタン
ラジオボタンを追加します。
ラジオボタンを追加
ラジオボタンを追加します。
ソースコード
import tkinter as tk

root = tk.Tk()
root.geometry("400x400")

radiobutton_value = tk.IntVar()

item_list = ["hogehoge1", "hogehoge2"]

for index in range(len(item_list)):
        radiobutton = tk.Radiobutton(root, text=item_list[index], value=index, variable=radiobutton_value, selectcolor="#000000")
        radiobutton.pack()

root.mainloop()
コマンド実行例
$ python3 -B tkinter_radiobutton.pyGUI画面

ラジオボタンの状態を取得
ラジオボタンの状態を取得します。
ソースコード
import tkinter as tk

root = tk.Tk()
root.geometry("400x400")

radiobutton_value = tk.IntVar()

item_list = ["hogehoge1", "hogehoge2"]

for index in range(len(item_list)):
        radiobutton = tk.Radiobutton(root, text=item_list[index], value=index, variable=radiobutton_value, selectcolor="#000000")
        radiobutton.pack()

radiobutton_num = radiobutton_value.get()
print(radiobutton_num)
print(item_list[radiobutton_num])

root.mainloop()
コマンド実行例
$ python3 -B tkinter_radiobutton_get.py
0
hogehoge1
GUI画面

リストボックス
リストボックスを追加します。
リストボックスを追加
リストボックスを追加します。
ソースコード
import tkinter as tk

root = tk.Tk()
root.geometry("400x400")

item_list = ["hogehoge1", "hogehoge2"]

listbox = tk.Listbox(root)
for index in range(len(item_list)):
        listbox.insert(index, item_list[index])

listbox.pack()

root.mainloop()
コマンド実行例
$ python3 -B tkinter_listbox.pyGUI画面

リストボックスの選択イベントを取得
リストボックスの選択イベントを取得する
ソースコード
import tkinter as tk

def select_listbox(event):
        select_item = listbox.curselection()
        select_num = select_item[0]
        print(item_list[select_num])

root = tk.Tk()
root.geometry("400x400")

item_list = ["hogehoge1", "hogehoge2"]

listbox = tk.Listbox(root)
for index in range(len(item_list)):
        listbox.insert(index, item_list[index])

listbox.pack()

listbox.bind("<<ListboxSelect>>", select_listbox)

root.mainloop()
コマンド実行例
$ python3 -B tkinter_listbox_curselection.py
hogehoge1
hogehoge2
GUI画面
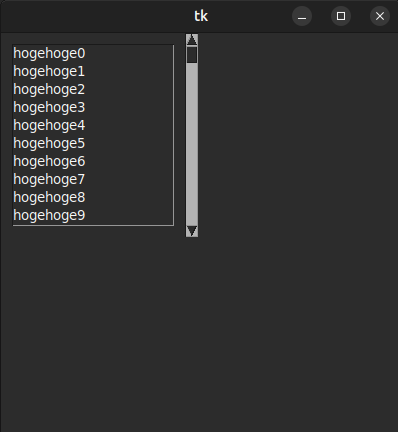
スクロールバーありでリストボックスを追加
スクロールバーありでリストボックスを追加する
ソースコード
import tkinter as tk

root = tk.Tk()
root.geometry("400x400")

scrollbar = tk.Scrollbar(root)
scrollbar.grid(row=0, column=1, sticky='ns')

item_list = ["hogehoge" + str(num) for num in range(100)]

listbox = tk.Listbox(root, yscrollcommand=scrollbar.set)
for index in range(len(item_list)):
        listbox.insert(index, item_list[index])

listbox.grid(row=0, column=0, padx=10, pady=10)
scrollbar.config(command=listbox.yview)

root.mainloop()
コマンド実行例
$ python3 -B tkinter_scrollbar_listbox.pyGUI画面
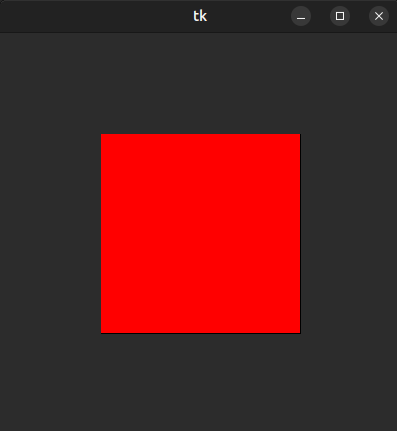
キャンバス
キャンバスを追加します。
キャンバスを追加
キャンバスを追加します。
ソースコード
import tkinter as tk

root = tk.Tk()
root.geometry("400x400")

canvas = tk.Canvas(root, width=200, height=200)
canvas.create_rectangle(0, 0, 200, 200, fill="red")
canvas.place(x=100, y=100)

root.mainloop()
コマンド実行例
$ python3 -B tkinter_canvas.pyGUI画面
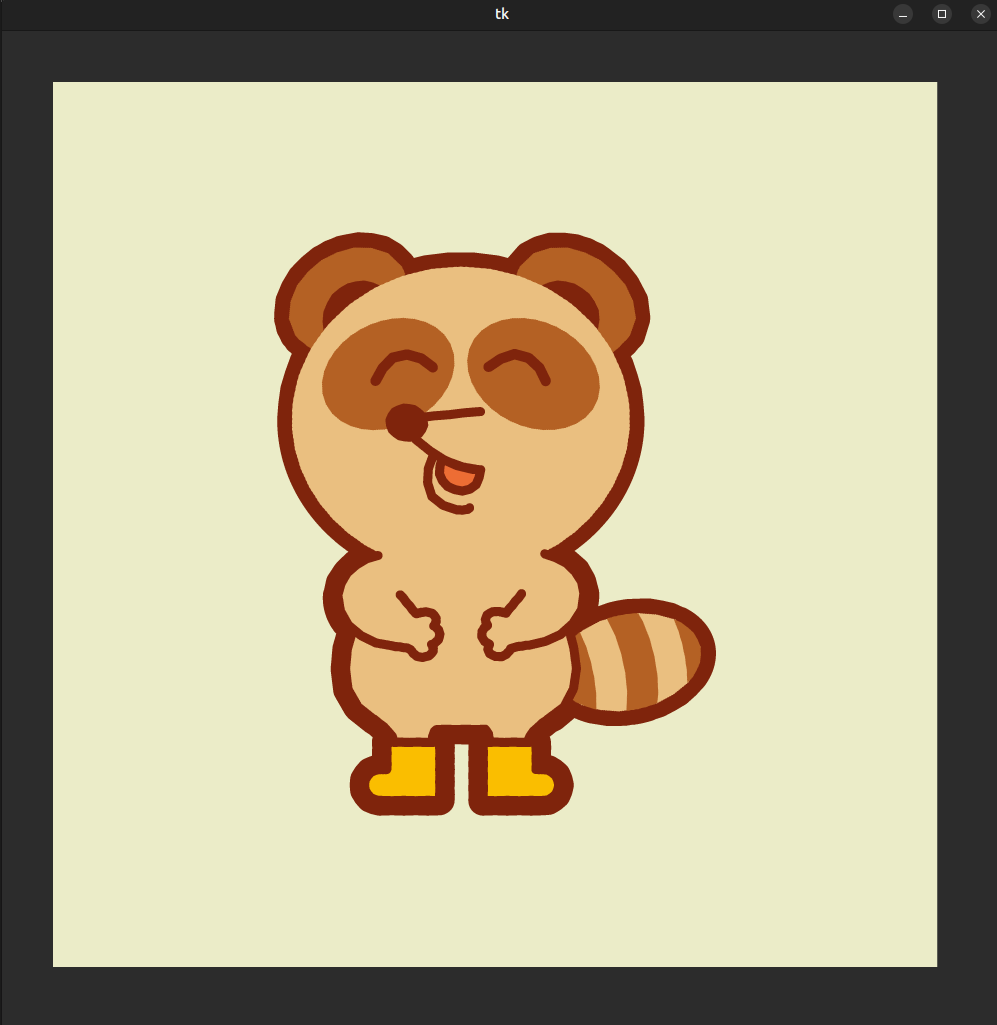
画像を追加
画像を追加します。
ソースコード
import tkinter as tk

root = tk.Tk()
#root.geometry("400x400")
root.geometry("1000x1000")

image_icon = tk.PhotoImage(file="icon.png")

canvas = tk.Canvas(root, width=1000, height=1000)
canvas.create_image(0, 0, image=image_icon, anchor=tk.NW)
canvas.place(x=50, y=50)

root.mainloop()
コマンド実行例
$ python3 -B tkinter_canvas_image.pyGUI画面
メニュー
メニューを追加します。
ソースコード
import tkinter as tk

root = tk.Tk()
root.geometry("400x400")

menubar = tk.Menu(root)
root.config(menu=menubar)

hogehoge_menu = tk.Menu(menubar, tearoff=0)
menubar.add_cascade(label="hogehoge", menu=hogehoge_menu)

hogehoge_menu.add_command(label="hogehoge_item1")
hogehoge_menu.add_command(label="hogehoge_item2")

root.mainloop()
コマンド実行例
$ python3 -B tkinter_menu.pyGUI画面
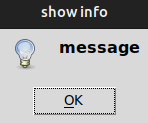
メッセージボックス
メッセージボックスを表示します。
情報表示
情報表示のメッセージボックスを表示します。
ソースコード
import tkinter.messagebox as messagebox

result = messagebox.showinfo("show info", "message")
print(result)
コマンド実行例
$ python3 -B tkinter_messagebox_showinfo.py
ok
GUI画面
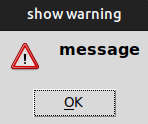
警告表示
警告表示のメッセージボックスを表示します。
ソースコード
import tkinter.messagebox as messagebox

result = messagebox.showwarning("show warning", "message")
print(result)
コマンド実行例
$ python3 -B tkinter_messagebox_showwarning.py
ok
GUI画面
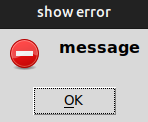
エラー表示
エラー表示のメッセージボックスを表示します。
ソースコード
import tkinter.messagebox as messagebox

result = messagebox.showerror("show error", "message")
print(result)
コマンド実行例
$ python3 -B tkinter_messagebox_showerror.py
ok
GUI画面
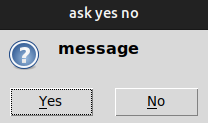
Yes/No選択
Yes/No選択のメッセージボックスを表示します。
ソースコード
import tkinter.messagebox as messagebox

result = messagebox.askyesno("ask yes no", "message")
print(result)
コマンド実行例
$ python3 -B tkinter_messagebox_askyesno.py
True
GUI画面
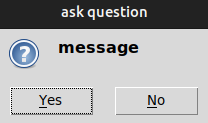
質問(Yes/No)
Yes/Noの質問のメッセージボックスを表示します。
ソースコード
import tkinter.messagebox as messagebox

result = messagebox.askquestion("ask question", "message")
print(result)
コマンド実行例
$ python3 -B tkinter_messagebox_askquestion.py
yes
GUI画面
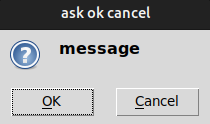
質問(OK/Cancel)
OK/Cancelの質問のメッセージボックスを表示します。
ソースコード
import tkinter.messagebox as messagebox

result = messagebox.askokcancel("ask ok cancel", "message")
print(result)
コマンド実行例
$ python3 -B tkinter_messagebox_askokcancel.py
True
GUI画面
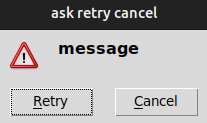
リトライ
リトライのメッセージボックスを表示します。
ソースコード
import tkinter.messagebox as messagebox

result = messagebox.askretrycancel("ask retry cancel", "message")
print(result)
コマンド実行例
$ python3 -B tkinter_messagebox_askretrycancel.py
True
GUI画面
まとめ
Pythonライブラリのtkinterの使い方を紹介しました。
- ウインドウを作成できる
- ラベルを追加できる
- テキストボックスを追加できる
- チェックボックスを追加できる
- ボタンを追加できる
- ラジオボタンを追加できる
- リストボックスを追加できる
- キャンバスを追加できる
- メニューを追加できる
- メッセージボックスを追加できる
tkinterライブラリを使った開発では、GUI画面による操作を可能としたアプリケーションを開発することができます。
GUIでは、ユーザーが操作しやすいインターフェースを提供できるので、操作性が向上します。
tkinterライブラリで、GUIアプリケーションを作成できれば、使いやすいアプリケーションが開発できます。